Hi all!
So I am about to pop and have been nesting and scrapbooking like a mad woman! Maybe I know I wont have much time to scrap and clean after the baby arrives. lol Anyway... I don't have any pictures of these projects at least for now but here are the videos, I hope you enjoy!
I have more to share, just need to get the videos done first, so stay tuned! :)
Thank you so much for stopping by!
Regan
Showing posts with label Cards. Show all posts
Showing posts with label Cards. Show all posts
Wednesday, July 11, 2012


Thursday, May 10, 2012
Better Late Than Never!
Here are a couple of videos from several weeks ago of the mini album I finished and some other projects I worked on.
Hopefully you will see more from me soon!
Regan
Hopefully you will see more from me soon!
Regan
Wednesday, December 7, 2011
Oh Christmas Tree - Papercraft Star
This week at Papercraft Star, the challenge is to include a tree somewhere on your project. We have also provided this lovely inspiration photo that is always use if you choose.

I just love Christmas but I have to say it seems to be getting here too quickly! This year has flown by!! For the challenge this week, I created a Christmas card. I am always inspired by multi-media projects on canvases or in art journals, so that was some of my inspiration for this card.

I used the Text Writing Backgrounds CMS digital sheet from The House Across The Bay to create my Christmas tree. First I sprayed it with Spanish Moss and Wheatfields glimmer mist to give the image a green and shimmery look, once dry I punched 4 Scallop circles, inked the edges with walnut stain and cut them apart. Layer them up, fluff your scallops and voila, a tree!

I typed my sentiment out on my vintage typewriter, cut them out, inked them and added an outline. The snowy hills were created from a label that I cut out on my Silhouette, cut apart, inked with tea dye distress ink and covered with frost white all purpose ink for shimmer. I am pleased with the way it turned out, and I think it definitely has a similar feeling to a mixed-media piece.
I had some leftover inspiration, so here is an additional card for you.....

I hope you will leave a comment or any questions you may have below! Stop by the Papercraft Star blog and play along with us! Link up your projects by 6:00am EST Monday December 13th for your chance to win! Also, every Tuesday on the PCS blog we give a free digital image from THATB!
Thank you for stopping by!
Regan
Punched Tree Card Supplies:
THATB: Text Writing Backgrounds CMS 141
Card Stock: White Printer card stock by Georgia Pacific, cream - unknown, and Crumb Cake by Stampin' Up!
Pattern Paper: Signature Christmas by My Minds Eye
Ink: Frost White all purpose ink by Fantastix, Walnut Stain & Tea Dye distress inks by Ranger, Pure Black Millennium pen (MS-01) by ZIG and White gel pen by Pilot Choose.
Tools: Typewriter, computer, printer, scallop circle punch by Stampin' Up!, Silhouette SD, label cut and scissors
Other: Snowflake button, and Spanish Moss & Wheatfields glimmer mist by Tattered Angels.
Misted Tree Card Supplies:
THATB: Text Writing Backgrounds CMS 141
Card Stock: White Printer Cardstock by Georgia Pacific and going gray by Stampin' Up!
Ink: Chocolate Chip by Stampin' Up!, frost white and silver all purpose ink by Fantastix for shimmer and old olive stampin' write marker by Stampin' Up!
Tools: Silhouette SD, Merry Christmas Tree cut, Big Kick, Swirls embossing folder by Tim Holtz, snowflake punch by Stampin' Up! and Scissors
Other: Spanish Moss, Wheatfields & iridescent gold glimmer mist by Tattered Angels and a button
Wednesday, November 30, 2011
Welcome Little One - Papercraft Star
First off, today is my oldest daughter's 5th Birthday! I can't believe she is five already, time has flown by! Baby girl, I am so blessed to be your Mom. You have brought my life more love and joy then you will ever know. Have a very Happy Birthday, I hope you have an incredible day! Love you!
Okay, now back to work. lol :) I hope each and every one of you had an amazing Thanksgiving!
This week Papercraft Star has another fabulous challenge for you, a sketch by the talented Kim Duran.


Okay, now back to work. lol :) I hope each and every one of you had an amazing Thanksgiving!
This week Papercraft Star has another fabulous challenge for you, a sketch by the talented Kim Duran.

Such a wonderful sketch, and so inspiring!
I was also inspired by this crib bedding.

Here is what I created.

For this card, I cut the Airplane with Banner using my Silhouette SD. The cloud is hand drawn and cut out by me. I used the White Grunge Squares from the Card Makers Series by The House Across The Bay. I did change the image by tinting it blue in Picasa 3 and then printing it out. Just like before when I printed the image in Sepia, this allows you to customize your digital images for more use.

I punched the top corners of the card using the scallop corner punch on my corner chomper. I also did some fun faux stitching and doodling to add more interest to the card. I love the way it came out and I hope you do also!
Thank you so much for stopping by,
Regan
Supplies:
THATB: White Grunge Squares CMS 139
Card Stock: Going Gray by Stampin' Up! and white printer card stock
Pattern Paper: Red from Scrap box - company unknown possible DCWV
Ink: Chocolate Chip by Stampin' Up!, Tumbled Glass, Tea Dye & Fired Brick distress inks by Ranger, and Pure Black (MS-01) Millinnium pen by ZIG.
Stamps: Nursery Necessities by Stampin' Up!
Tools: Silhouette SD, Airplane with banner cut, and scallop corner punch on corner chomper by We R Memory Keepers
Other: Striped ribbon by Stampin' Up!, Red button, and string from coffee stained tag by Kraft Outlet
Saturday, November 19, 2011
Christmas Wreath
Today I thought I would share a Christmas card I made inspired by the Christmas Planners I made for a swap.
Here are the planners...

and here is the card....

I made this card with the same general idea, but instead of corrugated cardboard I used kraft cardstock. I ran the cardstock through my big kick with the wood grain embossing folder by Tim Holtz, then I dry brushed it with white acrylic paint to give it a white washed look. I punched the branches out of scrap paper using the bird and branch punch by Stampin' Up! I traced a circle onto the card and layered my branches up around the circle to create a wreath. Add a bow and some small embellishments and your done! It kind of reminds me of a front door. :)
I hope you enjoyed my post today!
Thank you so much for stopping by,
Regan
Supplies:
Cardstock: kraft by The Paper Studio
Pattern Paper: green scraps in different shades and patterns
Tools: Bird and Branch punch by Stampin' Up!, Big Kick, wood grain embossing folder by Stampin' Up!, paint brush, and something round like a lid to trace a circle.
Other: white acrylic paint, red sequins, gold ribbon and glossy accents by Inkssentials
Wednesday, November 16, 2011
A Thank You Card - Papercraft Star
Well, it's Wednesday and that means another challenge has opened at Papercraft Star! This week the challenge is to create a thank you card. We have also been provided with this beautiful inspiration photo that is use if you choose.


I was really drawn to the glowing flames of the candles and the pumpkins in the photo....
Here is what I came up with.

The inspiration photo had a softness to it, so I really wanted to use vellum for the background rather than pattern paper. I dry embossed the vellum and added some color with Wild Honey Distress ink and stitched the piece on with my sewing machine. A simple banner is home to the sentiment.

I used the Romantic Lace digital sheet from The House Across The Bay and an oval punch to create my pumpkin base. I inked around the edges of the ovals with Wild Honey to achieve the look of the glow from the candles in the photo. For the stem/leaf I used the Halloween Backgrounds sheet and the boho blossoms punch by Stampin' Up!. I used some wire I cut from the little Prima rosettes and wrapped it around my paper piercer for a cute little vine.
I was having so much fun with the vellum and layout that I ended up making a couple of other cards.
First, I made this beautiful yet simple Christmas card.

For this card I decided to put the sentiment behind the vellum for a soft snowy look. The snowflake was punched out of the Write Stuff Backgrounds digi sheet using the snowflake punch by Stampin' Up! Some Frost White all purpose ink adds a little shimmer to the vellum and snowflakes.

Then I thought, how cute would it be to add confetti behind the vellum....

I hope my post has inspired you to create something today. Stop by the Papercraft Star blog and play along with us! You have until 6:00am EST on Monday November 21st to link up your entries for our challenge this week. I look forward to seeing your projects.
Thank you for stopping by,
Regan
Thank You Card Supplies:
THATB: Romantic Lace 098 and Halloween Backgrounds 173
Card Stock: Kraft by The Paper Studio and Going Gray By Stampin' Up!
Inks: Walnut Stain and Wild Honey distress inks by Ranger
Stamps: Much Appreciated by Stampin' Up!
Tools: Big Kick, dashes texture plate by Sizzix, sewing machine, oval punch by Fiskars, boho blossoms punch by Stampin' Up!, Computer and Printer
Other: green wire "stem" from Prima rosette and Vellum by Stampin' Up!
Christmas Card Supplies:
THATB: Write Stuff Backgrounds 031 and/or Romantic Lace 098 (printed in Sepia)
Card Stock: Kraft by The Paper Studio and Going Gray By Stampin' Up!
Ink: Walnut Stain & Tea Dye distress inks by Ranger, Chocolate Chip by Stampin' Up!, and Frost White all purpose ink by TSUKIENEKO for Fantastix
Stamps: Four the Holidays by Stampin' Up!
Tools: Big Kick, polka dot daisies texture plate by Sizzix, snowflake punch by Stampin' Up!, sewing machine, computer and printer
Other: Vintage Button and Vellum paper by Stampin' Up!
Birthday Card Supplies:
Card Stock: Going Gray and Tempting Turquoise by Stampin' Up!
Pattern Paper: random from scrap box
Ink: Walnut Stain & Wild Honey distress inks by Ranger and Chocolate Chip by Stampin' Up!
Stamps: Birthday Whimsy by Stampin' Up!
Tools: Big Kick, dashes texture plate by Sizzix, sewing machine, standard hole punch (for confetti), computer and Printer
Other: General Birthday adhesive chipboard sticker by K&Company and Vellum paper by Stampin' Up!
Saturday, November 12, 2011
Card making with a new crafter
So a couple of weeks ago a friend, Samantha, and I got together at my house. She wanted to learn how to scrapbook, so we made a few cards together. I think I may have her hooked! lol
We used the card below as our inspiration for the first cards we made.


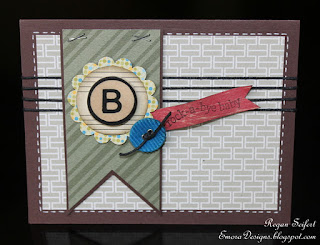


We used the card below as our inspiration for the first cards we made.

This is what she came up with....

Beautiful, isn't it? I think she did a fantastic job for her first card!!! :)
and this is what I came up with...


For our next card we used the design of this card as our inspiration....

We both made similar cards, here is hers.

Again, wonderful job!
and mine

Then we used the 10-27 2011 Sketchy Thursdays sketch here as our inspiration for her third card. I helped her with this one, only a little though.

And her card...

I think she had a good time and she did a wonderful job on all 3 of her cards! I hope you enjoyed my post today and will stop back by on Wednesday for another Papercraft Star challenge post.
Thank you so much for stopping by today!
Regan
Wednesday, November 2, 2011
Thankful - Papercraft Star
Hi, I hope everyone had a safe and fun Halloween! This week at Papercraft Star, the challenge is to include some type of flourish on your project. Today I have a couple of fall inspired thank you cards to share with you.

I used kraft cardstock for the base of my card and cut my main images (scallop circle, circle and flourish tree) using my Silhouette SD. I cut the flourish with my Big Shot and cut it apart to give the flourish a new look. The circle in the middle of the scallop is cut from the Text Writing Backgrounds Card Makers Series 141 from our sponsor The House Across The Bay.

I then added a button tied with some string from a tag and added a leaf that I had left over from my fall card a couple weeks ago, it too was cut using my Silhouette.
I was so inspired that I decided to make two cards.

I cut a banner shape to put my main images and added the same embellishments as the other card. For texture and interest I added some cord and some staples.

I hope you enjoyed my projects today and are inspired to play along with us this week at Papercraft Star! For your chance to win prized from our sponsor The House Across The Bay, please have your entries linked up on the PCS blog by 6:00am EST on Monday November 7th.
Thank you for stopping by today!
Regan
Silhouette Cuts:
Nested Scallops - cut at 2.375 & 2.000
Nested Circles - cut at 2.015 & 1.705
Flourish Tree - cut at 1.590 X 1.145 & 1.865 X 1.340
Supplies:
THATB: CMS text writing backgrounds 141 (circles) and Grunge 101 ATC 023 (leaf)
Cardstock: kraft by The Paper Studio
Pattern Paper: Pumpkin Pie by K&Company and Fall in Love by My Minds Eye
Ink: Walnut Stain, Tea Dye and Fired Brick distress inks by Ranger, and chocolate chip marker by Stampin' Up!
Stamps: Much Appreciated & Holiday Best by Stampin' Up!
Tools: Silhouette SD; Cuts - nested circles, tree flourish, nested scallop circles, and leaves; stapler, xyron create-a-sticker model 150; corner chomper 1/4' & 1/2' corner rounder; Big Kick; and flourish sizzlet
Other: Buttons, string from tag, braiding cord by Horizon Group USA, and white gel pen by Pilot CHOOSE
Wednesday, October 26, 2011
Up, Up and Away - Papercraft Star
Good morning crafters!! Another challenge has opened at Papercraft Star and this week Kim has provided us with this fabulous sketch.

Halloween is almost upon us, so you would think that I would have a Halloween project to share but NOPE; today I have a hot air balloon card to share! Recently my family and I headed to the Balloon Fiesta to take in the amazing sight of all the fun and beautiful balloons that rise daily for two weeks in Albuquerque. We had a wonderful time and the balloons were so cool. Anyway, they provided a ton of inspiration....
Enough rambling, here is my card.

I did some flipping of Kim's sketch to come up with this layout. The background is heat embossed with glitter using heat & stick powder from Stampin' Up! I fussy cut some images from the Hot Air Balloons ATC 094 and Hot Air Balloon Digital Collage 003 digi sheets from The House Across The Bay to use as my focal point.

I gave the balloons dimension by using foam tape and glue dots to adhere them. I wrapped some bakers twine around a few times and tied it in a bow to finish off the card. I think the card is super cute and I must admit I love the colors.
Stop by the Papercraft Star blog and submit your entries for this week's challenge. You have until 6:00am EST on Monday October 31st to post your project to our Mr. Linky. I look forward to seeing your creativity!
Thank you so much for stopping by today!
Regan
SUPPLIES:
THATB: 094 Hot Air Balloons ATC and 003 Hot Air Balloons Digital Collage
Cardstock: whisper white by Stampin' Up!
Patterned Paper: tropical paradise by Pressed Petals
Ink: Tea Dye and Walnut Stain distress inks by Ranger
Tools: Big Kick, Circle #2 die by Stampin' Up!, 1" circle punch, scissors, corner rounder punch by Stampin' Up!, heat gun, and We R Memory Keepers corner chomper (corner rounder 1/2")
Other: black & white bakers twine, foam tape, glue dots, heat & stick powder by Stampin' Up!, dazzling diamonds multi ultra fine glitter by Glitterex Corp.
Wednesday, October 19, 2011
Spooky Halloween - Papercraft Star challenge #67
Halloween is creeping up on us and Papercraft Star has the perfect challenge to get your Tricks & Treats completed!

Challenge 67 - A trick or a treat - anything haunted!!
Okay, I know I say this a TON but I had a blast making my card for this challenge!

I used ribbon, fiber, die cuts, inking, stitching, and fussy cutting to get this look, which is why it was so fun to make! I layered the fibers and burlap ribbon, along with the die cut for a fun look. I scrunched up some burlap ribbon and stitched over it to flatten it out a bit for a more interesting look.

Stop by Papercraft Star and play along with us! You have until 6:00am EST on Monday to post your entries for this challenge, I hope to see you there!
Thank you for stopping by and Happy Haunting!
Regan
Supplies:
THATB: Spooky Halloween Nine (026)
Card Stock: Basic Black & Very Vanilla (inside) by Stampin' Up!
Pattern Paper: Spook Alley by Making Memories
Ink: Basic Black by Stampin' Up!
Tools: Big Kick, sewing machine, large classic inverted scalloped circles by Spellbinders (largest), computer and printer
Other: Black Metallic Adornaments by EK Success, Burlap Ribbon from Wal-Mart and crackle accents by Inkssentials
Wednesday, October 12, 2011
Fall Leaves - Papercraft Star challenge #66
Hello creative friends!! It is an exciting day today... why you ask?! Not only is today my birthday, but it is also time for another challenge at Papercraft Star!!
I love earth tones and fall colors so this weeks challenge at PCS was perfect! I chose to make a card using the 4 inch text writing background squares from the card makers series (141) and the Grunge 101 ATC sheet (023) from our wonderful sponsor The House Across The Bay.


I had so much fun making this card that I even decorated the back and inside of the card!


Card Stock: White Printer card stock
Pattern Paper: Kay's Autumn by Me & My Big Ideas
Ink: Tea Dye, Walnut Stain, Fired Brick and Wild Honey distress inks by Ranger
Tools: Silhouette SD, Computer, Printer, hot glue gun, BigKick, and Lots Of Tags sizzlets by Stampin' Up!
Other: Tim Holtz Regal mini mask, Ivory pleated decorative trim by Hobby Lobby, Burlap Ribbon from Wal-Mart, Brown Tulle from Joann's, water, crackle accents and Wheatfields glimmer mist by Tattered Angels.
I love earth tones and fall colors so this weeks challenge at PCS was perfect! I chose to make a card using the 4 inch text writing background squares from the card makers series (141) and the Grunge 101 ATC sheet (023) from our wonderful sponsor The House Across The Bay.

I used a Tim Holtz mask on the piece (Totally inspired by Jan of PCS) I used from the 4 inch text writing background squares to add some dimension to the background. I used ink, glimmer mist and water to get a more distressed/weathered look.

The Grunge 101 ATC sheet was perfect to cut out these tiny leaves! I used my new Silhouette SD that I actually won in a giveaway to cut these cuties out!! The great design was already there, I just added distress inks to get a variety of colored leaves and added a bit of crackle accents with my finger for texture.


I just love how it turned out! A beautiful card for a fall birthday or wedding, or just to tell someone how grateful you are to have them in your life!

To participate in this weeks challenge, please link up your projects by 6:00am EST on Monday over at Papercraft Star's Blog. Be sure to include a leaf on your project!
a little inspiration....

I am so glad you stopped by today! Please leave a comment and let me know you were here.
Have a wonderful week,
Regan
Supplies:
THATB: 4 inch Text Writing Background Squares the card makers series 141 and Grunge 101 ATC sheet 023Card Stock: White Printer card stock
Pattern Paper: Kay's Autumn by Me & My Big Ideas
Ink: Tea Dye, Walnut Stain, Fired Brick and Wild Honey distress inks by Ranger
Tools: Silhouette SD, Computer, Printer, hot glue gun, BigKick, and Lots Of Tags sizzlets by Stampin' Up!
Other: Tim Holtz Regal mini mask, Ivory pleated decorative trim by Hobby Lobby, Burlap Ribbon from Wal-Mart, Brown Tulle from Joann's, water, crackle accents and Wheatfields glimmer mist by Tattered Angels.
Wednesday, September 28, 2011
Ooh la la... Lace!

Happy Wednesday! The challenge this week at Papercraft Star is Lace!
Check out this beautiful photo to spark some inspiration....

So Pretty! I just love lace!!
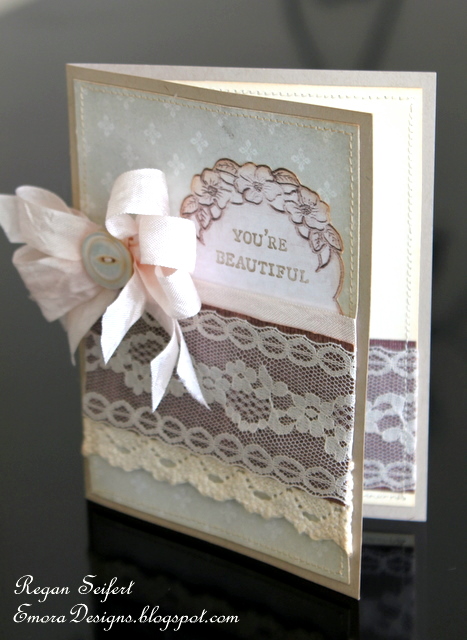
For my project this week, I used the Romantic Lace 098 digi sheet from The House Across The Bay. I did alter it a bit by printing the digi sheet in Sepia! There are so many ways to use digital images which makes them so much fun to play with.

I cut around the lace applique looking piece, from the digi sheet, to create a label for my sentiment. I used a neutral color palette and added lace, crochet lace, seam binding and a vintage button for a softer look.
I am so addicted to using my sewing machine on scrap projects right now, so I had to do some sewing! I also finished the inside by adding a strip of brown pattern paper with some lace.
I hope you enjoyed my post today. Remember to post your entries on the Papercraft Star blog by 6am EST on Monday October 3rd for your chance to win prizes from our sponsor The House Across The Bay!
Thank you for stopping by,
Regan
Supplies:
THATB: Romantic Lace 098
Card Stock: Crumb Cake by Stampin' Up and Cream (unknown)
Pattern Paper: The Linens & Lace stack by DCWV
Ink: Tea Dye and Walnut Stain Distress Inks by Ranger
Stamp: Celebrate Mom by Hampton Art
Tools: Hot Glue Gun, Sewing Machine, computer and printer.
Other: Vintage button, Beige Flexi-Lace hem facing by Wrights, Pearl glimmer mist by Tattered Angels, seam binding, crochet lace by Crafter's Square, and crochet thread.
Sunday, September 25, 2011
Pretty Packaging....
Hi! I thought I would share with you how I packaged the cards I made for Papercraft Star Wednesday. You can see that post Here. It was quite simple really... I just stacked the envelopes and cards, wrapped them with pretty ribbon, and tied a vintage button around the excess ribbon to keep it all together.

I participated in a couple of swaps over at Your Paper Pantry, and this is how I packaged those!

I used the pretty vintage bags for the wrapping paper on the book I packaged. I very carefully took one of the bags apart to create one large piece that I could wrap the book with. The other goodies were simple placed in the bag, flapped over and tied up pretty!

I learned how to make the gorgeous black flower from Rina, ScrapStress on YouTube.
Do you have some fun packaging ideas? Please share your link with me and I will stop by!
Thank you for stopping by,
Regan
Wednesday, September 21, 2011
Papercraft Star - Challenge 63
Happy Wednesday!
This week's challenge at Papercraft Star is a sketch by the talented Kim Duran!



This week's challenge at Papercraft Star is a sketch by the talented Kim Duran!

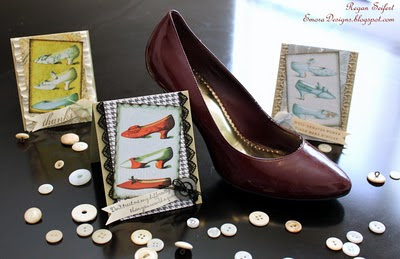
For my project this week I chose to use the Shoe Fetish (165) digi sheet from The House Across The Bay along with the sketch to create a set of cards.

These cards measure 3 1/2 X 4 1/4 inches.


The Shoe Fetish digi sheet features 6 images of shoes in different colors; I think these cards would make a cute gift set for the fabulous girl in your life. Visit The House Across The Bay Etsy today!
Be sure to head over to the Papercraft Star blog and upload your project for this week's sketch challenge! You have until 9:00 PM EST on Sunday to submit your entries. See you there!
Thank you for stopping by,
Regan
Get The Look:
Card Base - 3 1/2 X 8 1/2 inches (fold in half at 4 1/4)
Pattern Paper - 2 3/4 X 4 1/4 inches
Banner - 1/2 inch by length required for sentiment (about 3 inches)
Supplies:
THATB: Shoe Fetish 165
Card Stock: River Rock and Very Vanilla by Stampin' Up!
Pattern Paper: Scraps from my scrap box (Stampin' Up!, Me & My Big Ideas and Basic Grey)
Stamps: Favorite Thoughts and Many Thanks by Stampin' Up!
Ink: Basic Black by Stampin' Up! and Walnut Stain by Ranger
Tools: Glue Gun, computer & printer, glossy accents
Other: Lace & Trims by Stampin' Up! and Recollections
Subscribe to:
Posts (Atom)


