Showing posts with label Other Projects. Show all posts

Friday, June 9, 2017

Pocket Scrapbooking our year in Korea

While living in Korea, I started a project life style album to document our adventures there. Here are the first 3 months. I really need to get things out and start working on them again. It is definitely an album I would like to finish!

Enjoy....


Thank you for stopping by!
Regan

Friday, July 15, 2016

Draw Something!

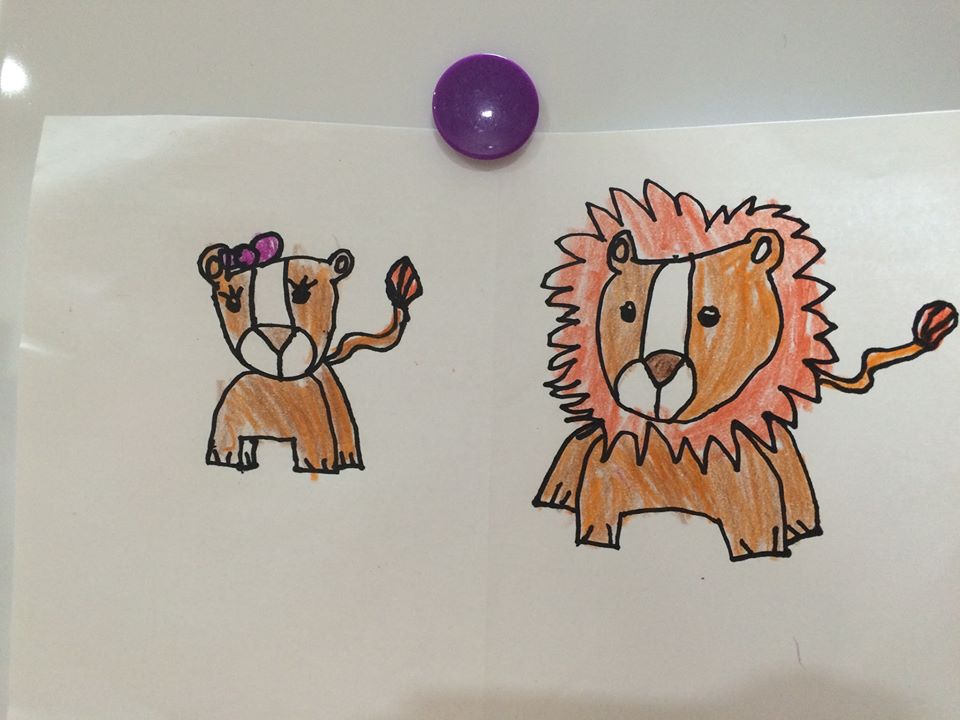
        I have shared with you once before that I love to try anything crafty so drawing just happens to be one of the things I have tried lately. In my last post I shared that I homeschooled my girls last year. That means that I get to teach art! We did some painting, paper piecing, travel scrapbooking, play with clay, among other things. Some weeks we did drawing.

        I stumbled upon a YouTube channel called Art Kids Hub last year and my kids love it! We have drawn several of the things on his channel. What I love about it is that he speaks and draws in simple terms for the kids, he helps them to feel confident in what they have completed and lets them know that mistakes are ok. It's fun that we can all draw the same thing but they can look so different. He has both simple drawings and challenging ones, but they are all for kids. I love that he colors the drawing afterwards and offers videos on how to blend.


This one is drawn by my 3 year old!


        Since beginning the videos, I have seen an improvement in their drawing skills, both when they do videos and draw in their free time. Learning how to draw simple lines and shapes has helped them a ton. I think that maybe this year, we can focus on our blending and shading skills.

        This week my girls and I stumbled upon another awesome YouTube channel called Draw So Cute! She does break down the lines, but I feel like Art Kids Hub does a better job at this. She also doesn't pause enough to give the kids time to draw them all the time, lucky for us, we have a pause button! With that said, her drawings really are so cute and the kids have been addicted for the last 3 days! They have drawn animals, fun food, school supplies, princesses, etc. I'm not going to lie, I have become just as addicted! Drawing these cute little things is so much fun and it's something my kids can do with me!


These were fun to draw, color and cut out for paper doll fun!

I think that some of these would be so cute on the front of a card and the kids could make it themselves! SO much fun! Whether you have kiddos or not, I hope that you will check out both channels and give it a try!

Until next time!     

Thursday, October 4, 2012

Key Chains and a Mini Album

 Hi there!

       Today I have some projects to share with you. The first is a set of keychains I created for the September Baubles, Bangles and Beads swap that I host over at YourPaperPantry.


Here are some photos of those keychains.


I also created a mini album for my sister for her birthday. I was inspired by Heather at StayBeautiful84 and Mari at mnc512.


I have made several scrapbook layouts but haven't had the chance to photograph or make a video of them yet. Hopefully I will be able to do that soon.

Thank you for stopping by!
Pour Your "Art" Out!
Regan

Wednesday, December 14, 2011

Ornaments, Baubles and Bells....Oh My!

Hi there, I hope you are all having a wonderful week. Things around my house are pretty crazy in preparation of the upcoming holidays. I hope things aren't too crazy for you!

Today Papercraft Star opened another challenge! This week your challenge is to include a bell or ornament somewhere on your project, and they have provided us with this beautiful photo as inspiration. (photos are always use if you choose)


I decided to take this challenge literally by creating a couple of ornaments.


I used a glass ball ornament I purchased at Michael's some time ago as my base. I then printed Victorian Ads II by The House Across The Bay on tissue paper (I simply taped the tissue paper to printer cardstock and ran it through my printer) and mod podged it on in sections. After the ornament was dry, I sprayed them with Iridescent Gold glimmer mist to add a little shimmer.


Once that dried I decorated the ornaments with some seam binding I colored with my new Lindy's Starburst sprays, some elements cut from holiday picks and a feather for a little flair!

I think they are beautiful and I hope you enjoyed my post today!

Hop on over to the Papercraft Star blog and play along with us. You have until 6:00am EST on Monday December 19th to link up your projects for your chance to win!

Thanks for stopping by,
Regan

Supplies:
THATB: Victorian ads II #184
Paper: White tissue paper and printer cardstock
Tools: Hot glue gun, heat gun, computer, printer, tape, and an old paint brush
Other: Holiday picks, white seam binding by Hug Snug, glass ornament (2.63in/67mm), black feathers, Iridescent Gold glimmer mist by Tattered Angels, Mod Podge, Gator Gumbo Olive & Poinsettia Red Gold Starburst sprays by Lindy's stamp gang.

Sunday, September 25, 2011

Pretty Packaging....

Hi! I thought I would share with you how I packaged the cards I made for Papercraft Star Wednesday. You can see that post Here. It was quite simple really... I just stacked the envelopes and cards, wrapped them with pretty ribbon, and tied a vintage button around the excess ribbon to keep it all together.


I participated in a couple of swaps over at Your Paper Pantry, and this is how I packaged those!


I used the pretty vintage bags for the wrapping paper on the book I packaged. I very carefully took one of the bags apart to create one large piece that I could wrap the book with. The other goodies were simple placed in the bag, flapped over and tied up pretty! 


I learned how to make the gorgeous black flower from Rina, ScrapStress on YouTube.
Do you have some fun packaging ideas? Please share your link with me and I will stop by!

Thank you for stopping by,
Regan

Tuesday, September 13, 2011

Halloween Goodie Bags

Hi there! Can you tell I am on a Halloween kick?! :) Today I would like to share with you the Halloween themed goodie bags I created for YourPaperPantry's lunch bag up-cycle swap group.


The paper I used on this project is from the Midnight Spell stack by DCWV and from Halloween in Wonderland by Graphic 45. You can find the rest of the supplies at the end of this post. 


The ephemera image is from Prim Primitives and the label is from Graphics Fairy (I think). You can find the bottle template at House of Stir Fry

We were to make 5 (I made 6) for this swap. I had so much fun creating these and I look forward to seeing what the other ladies made. Come join us at Your Paper Pantry!

Thank you for stopping by!
Happy Crafting,
Regan

Supplies:
Patterned Paper: The Midnight Spell stack by DCWV and Halloween in Wonderland by Graphic 45
Card Stock: White Printer card stock
Ink: Basic Black classic ink, Pumpkin Pie craft ink, and More Mustard craft ink by Stampin' Up!
Stamps: Studio G
Ephemera: Witch from Prim Primitives and label from Graphics Fairy
Tools: hole punch, ATG, computer & printer, and Bottle Template from House of Stir Fry
Other: foam tape, baker's twine, Harvest Orange glimmer mist by Tattered Angels, black tulle, grunge board, and metal edge grunge tag by Kraft Outlet.

Wednesday, August 10, 2011

Family - Papercraft Star

Hi, today challenge 57 opens at Papercraft Star. This week the challenge is books! Use a title, a theme or even a book cover somehow on your project.

theHouseAcrosstheBay is Papercraft Star's permanent sponsor and Rilly has given the design team some great digital sheets to work with. She will also be providing the prizes for the challenges and is graciously giving PCS followers freebies monthly. If you haven't checked out theHouseAcrosstheBay (THATB), you really should!

For my project this week I used book pages from an old dictionary and the vintage ad frames V2 from THATB to create little ATCs (artist trading cards) for each family member/group. I think they would look great on a handmade family tree, in a heritage book or as a fun ornament! They were super fun and easy to make!


I printed the vintage ad frames out, cut them out and inked the edges in tea dye and walnut stain distress inks. I stitched some book pages to the edges of the frames using my sewing machine and cut them with small scallop scissors to add a cleaner look.


After that I printed my photos in sepia small enough to fit on the card and decorated the cards with vintage buttons and other fun embellishments.


A fun family tree display....


I hope you were inspired by my project today and will join us for challenge 57 at Papercraft Star!

I appreciate the time you take to leave comments.
Have a wonderful week!
Regan

Wednesday, July 27, 2011

Anything Goes - Papercraft Star

It is time for challenge 55 at Papercraft Star. This week Anything Goes, that's right.... Anything!

Create the papercraft project of your choice and link it up at the PCS blog by 6:00 AM EST Monday August 1st.

I decided to take the opportunity to turn this......


into this.....


I have had this metal sign for some time and I am so glad I was finally able to use it! 

I adhered the paper onto the metal with Mod Podge and wrapped the pattern paper around to the back using the red line - Terrifically Tacky Tape.


The fun part - I picked embellishments from my stash and created my very own magnets!


Think outside the box: the photo magnet - the photo is set in the metal piece from an end of a Pillsbury crescent roll container!


It was such a fun and super easy project. I think it would be great to make one with/for your kiddo! Remember to link up your projects to the Papercraft Star blog, we love to see what you create!

Also, Papercraft Star is having a design team call right now! I have enjoyed being a member of the PCS team and I know you will too! Stop by the PCS blog to find out more.

Thank you for stopping by!
Regan

Supply List:
Pattern Paper: Handmade collection by K&Company
Metal sign/board
Magnets
Tea Dye distress ink by Ranger
Embellishments to create your own magnets
typewriter

Wednesday, June 15, 2011

World's Greatest Dad - Papercraft Star

NOTE: IF YOU ARE LOOKING FOR THE TECHNIQUE JUNKIES BLOG HOP CLICK HERE!


I am so excited to share the super fun challenge we have for you this week at Papercraft Star!! I had such a fun time with this challenge and I know you will too!

Create a project using the letters "S", "T", "A", "R" as inspiration for your project. (i.e. "S" for sentiment, "R" for ribbon, etc.,)

Father's Day is right around the corner, this Sunday, so I thought it would be fun to create an award to honor the men in our life.

My letter inspiration is as follows...
S - Stamp & Stripes
T - Tim Holtz (of course!)
A - Adhesive
R - Ribbon


I used the Happy Father's Day set from TradeFish Designs to stamp my sentiment. The stamp also has Grandpa, Granddad, Grandfather and Pop.


This could be used as a pin, magnet, gift topper or an embellishment! So many options and you can get as elaborate or as simple as you'd like! I had so much fun creating this and I plan on creating more for all sorts of occasions!

You have until 9:00 PM EST Sunday June 19th (Father's Day) to upload your entries to the Papercraft Star blog for this challenge. I look forward to seeing what you do!

The Design Team and Prize Sponsor this month is...


I hope my project today inspired you to create your own!

Thank you for stopping by,
Regan

Supply List:
Patterned Paper: Paper Stash Seasonal by Tim Holtz
Ink: Tim Holtz Walnut Stain Distress Ink by Ranger
Tools: Martha Stewart Score Board, 1 3/4 inch circle punch by EK Success, Hot Glue Gun, Cricut, and Stand & Salute cartridge
Other: Basic Black 1 1/4 inch Striped Grosgrain Ribbon by Stampin' Up!, pop dots, Terrifically Tacky Tape and Scotch quick-dry adhesive.

Friday, May 27, 2011

Birthday Fun - I Brake For Stamps

Hi, I hope that you all had a great week. It's Friday and that means it is almost the weekend... WooHOO!

Today I have a couple of projects to share with you for I Brake For Stamps. For my projects today I used the new Rick St. Dennis stamps, Birthday Bear and Clown Bear.

Shop IBFS - Use my coupon code SAVE10REGAN to save 10% off your order at checkout!

For my first project and created a clean and simple birthday card using the Birthday Bear Stamp.


For my next project, I created a cute little pocket card to give to that special birthday girl or boy in your life. It is complete with stamped images and crayons for the birthday girl/boy to enjoy!


For this pocket I used both the Birthday Bear and the Clown Bear stamps by Rick St. Dennis.


I hope you enjoyed my projects today. Remember to shop I Brake For Stamps with coupon code SAVE10REGAN!

I appreciate your comments! :)
Have a great weekend friends!
Regan

Thursday, May 19, 2011

Papercraft Star - Photo Fragment Charm Tutorial

Hi all, I am here with Papercraft Star to share a fun and much requested tutorial with you. Today I am going to share with you how I adhere photos and patterned paper onto the Tim Holtz fragment charms to create fun and personalized charms. These charms are great for charm bracelets, mini albums, swivel clasps and even key chains! Below you will find the video tutorial and examples of fun ways to use them!


I hope you enjoyed today's tutorial and are inspired to make your own. I hope you will stop by the Papercraft Star blog tomorrow to see the executive reveal from Kristina!

Thank you for stopping by!
Regan